We've covered the general tools and recommendations for online lessons in a previous post. This one goes further — with specifics on how to position your instrument and camera, what to watch for on exam day, and a couple of product recommendations that have made a real difference in our students' setups.
The two things you need to start
Before anything else, you need two things in place:
- An instrument at home that you can practise on between lessons.
- A device with a decent camera, microphone, and reliable internet connection.
Everything else is about getting the most out of those two things.
Camera angle — the most important setup detail
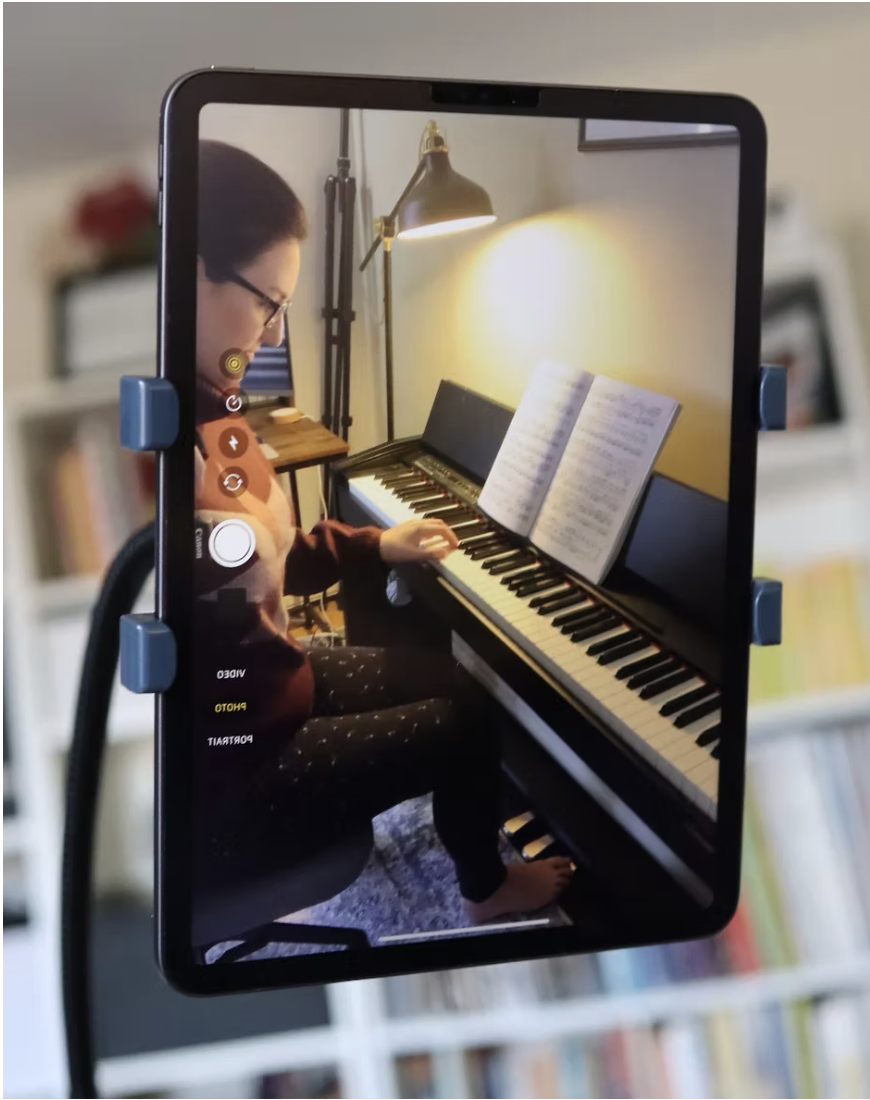
Your teacher needs to see you. This sounds obvious, but the angle makes an enormous difference in what they can actually coach. The ideal view shows the student and the instrument together, so posture, hand position, and technique can all be observed and corrected in real time.
Setup varies a little by instrument:
- Guitar, violin, and voice students: Sit facing the device or angled slightly to the side so you can see your music comfortably and your teacher has a clear view of you.
- Piano students: Your setup is a bit more involved — read the section below carefully.
Piano students: what your teacher needs to see
We're not just teaching you what to play — we're teaching you how to play. Posture, weight transfer, and pedal technique are all part of the lesson. If your teacher can't see them, they can't correct them.
A side-view angle works best for piano. A tablet or phone on a stand gives you the most flexibility to dial in the right position and move the camera quickly if you need to show something up close.
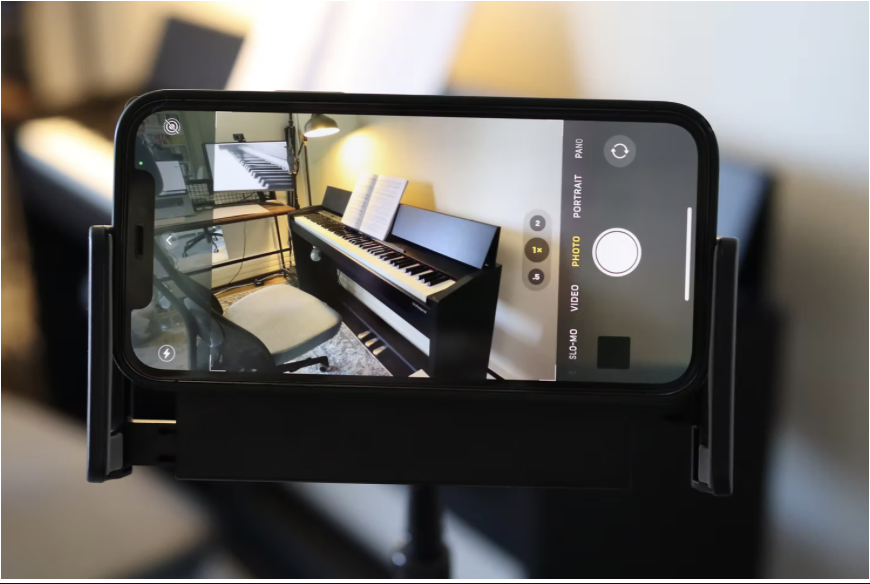
No stand? No problem
If you're on a laptop or don't have a dedicated stand yet, here are two quick fixes:
- Place the device on a chair or small table beside the piano. If the angle is too low, stack some books underneath to raise it.
- If you're using a tablet or phone and can't get it to stand upright, two cans from the pantry on either side work surprisingly well as a makeshift holder.
Device and connection tips
- Test your connection before the lesson. Use an ethernet cable if possible — it's significantly more stable than Wi-Fi.
- Ask other household members to avoid heavy streaming during your lesson time. Video calls are sensitive to bandwidth.
- Use the device with the best camera and microphone — this isn't always the laptop. Chromebooks in particular are not recommended for online music lessons due to audio quality limitations.
Exam day setup
Online RCM exams have specific requirements. The infographic below covers everything you need to have in order before your exam begins — camera angle, device, books, and how the Zoom link will be sent to you.
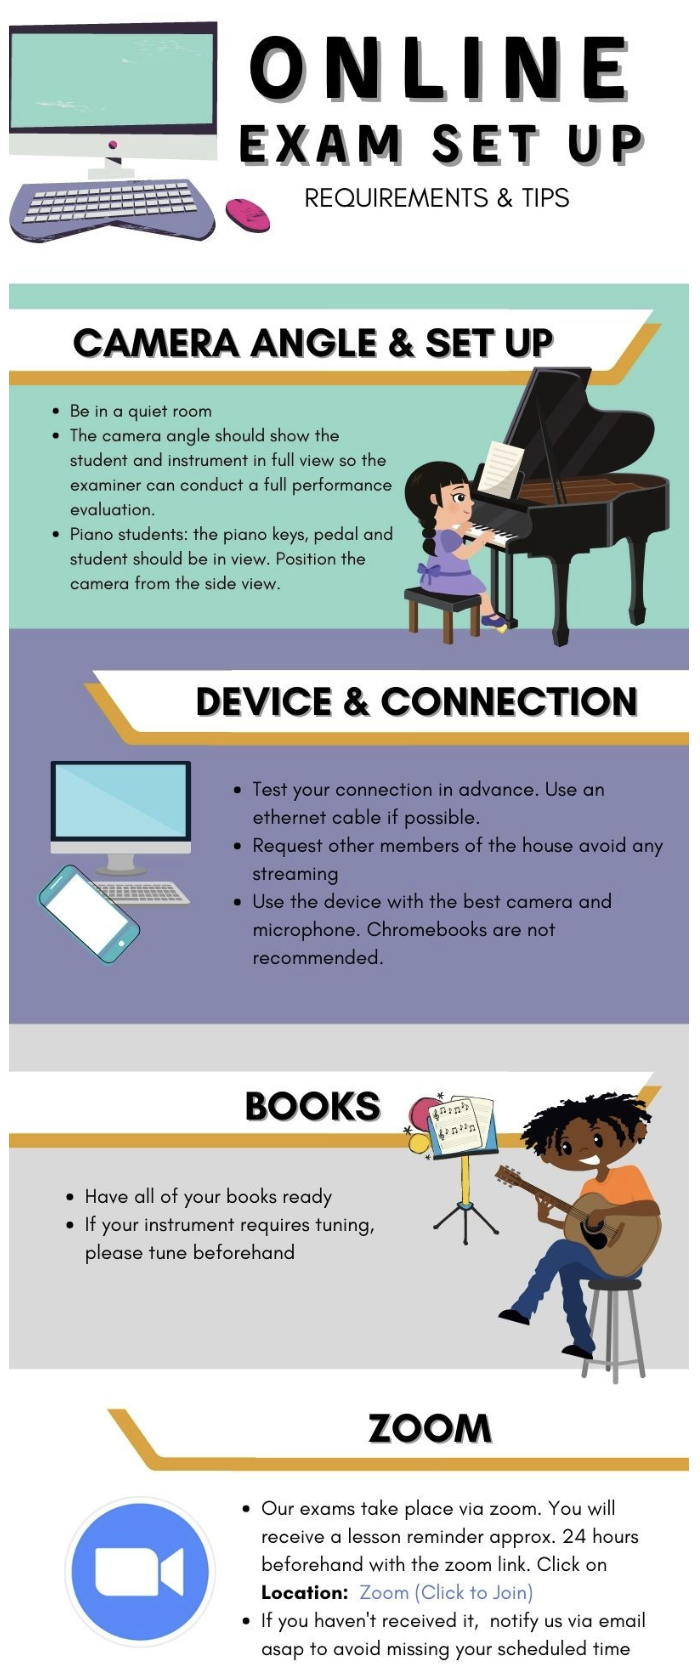
For piano exams specifically: the examiner needs to see the keys, the pedal, and the student in a single frame. Position the camera from the side before your exam begins and do a quick test call if you're unsure.
Zoom link: you'll receive a reminder approximately 24 hours before your exam with the Zoom link included. If you haven't received it, contact us right away so we can sort it out before your scheduled time.
Recommended stands
Two stands that have seen a lot of use and genuinely improve the online lesson experience:
Your teacher will guide you and make additional recommendations during your lessons. With the right setup, online lessons work extremely well — reach out any time if you need help getting yours sorted.